Setting up Sublime Text 2
I recently decided it was finally time to part ways with TextMate, my trusty companion for these last few years, and start the hunt for a new editor. After a quick Twitter poll the unanimous advice was that I should try Sublime Text 2.

After a few weeks of using Sublime Text I can safely say that it's the best editor I've used. It's fast, extendable and hasn't ever crashed on me. That said, that no editor is perfect and Sublime Text does require a fair bit of initial configuration.
After you've downloaded & installed the editor, the first step to configuring Sublime Text 2 is to install the package manager. I'm hoping in future versions of the editor this package manager will come bundled, but for now it requires a separate installation. Run Sublime Text, Press ctrl ` (control backtick) to open the editor's console, and paste in the code listed here.
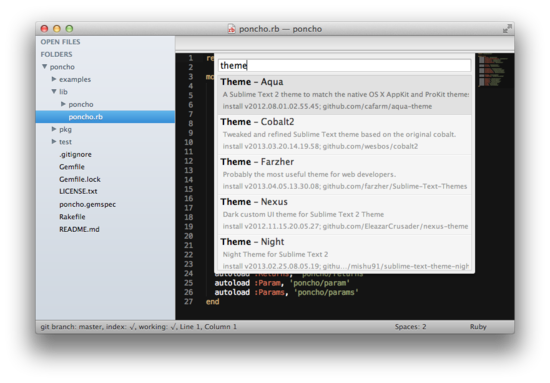
Once the manager is set up, you can install packages with ⌘⇧p (command shift p) and typing Install Package.
Theme - Soda
Sublime's initial look leaves a lot to be desired. However, luckily there's a beautiful theme called Soda. To install Soda, open the package manager (⌘⇧p), type 'Install Package ↵', and then 'Theme - Soda ↵'.
To activate the theme, open Sublime's preferences ⌘, (command comma), which is a JSON file, and set the "theme" key to "Soda Light.sublime-theme" (Remember to check commas).
{
  "theme": "Soda Light.sublime-theme"
}
You may have to restart the editor, or at least open a new window, for the theme to activate.
Extending the editor
There are a few other packages to install:
SideBarEnhancements - Adds useful file operations to the sidebar, such as 'New file', 'New folder' etc.
AllAutocomplete - Allows autocompletion across open files.
TrailingSpaces -Strips trailing whitespace from files.
Follow the same steps as before to install the packages, ⌘⇧p and "Install package".
Tabs & Spaces
The default indentation style uses tabs instead of spaces, and it's likely that you'll want to switch this (unless you solely program in a language where that's the convention, such as Go). Open Sublime's preferences (Settings - User or ⌘,) and add:
{
  "tab_size": 2,
  "translate_tabs_to_spaces": true
}
If you're anything like me, and dread trailing white space, then you should install the TrailingSpaces package. You'll need to change the default preferences for the plugin too. Open TrailingSpace's preferences (Preferences -> Package Settings -> TrailingSpaces -> Settings - User), and add:
{
  "trailing_spaces_include_current_line": false
}
Also add this to your global user preferences (⌘,):
"trim_trailing_white_space_on_save": true
Key bindings
There's a key binding I used the whole time in TextMate: ⌘ ctrl r to reveal the currently opened file in the sidebar. You can add this to Sublime by opening the key bindings preferences (Preferences -> Key Bindings - User) and adding:
[
  {"keys": ["ctrl+super+r"], "command": "reveal_in_side_bar"}
]
Sublime's fuzzy search (⌘ t) is incredibly fast and convenient, and it's my primary way of navigating around my projects. As well as navigating by file name, you can go to a particular line in a file by typing :123 (colon line number) or to a particular method by typing #name (hash method name).
Command line
Surprisingly Sublime Text doesn't come with a easily accessible binary, since this is probably the primary way developers will open the editor. That said, you can easily add support by creating a symlink:
ln -s "/Applications/Sublime Text 2.app/Contents/SharedSupport/bin/subl" /usr/bin/subl
I also use an alias in my ~/.bash_profile file, allowing me to easily open a directory from the terminal:
alias e='subl . &'
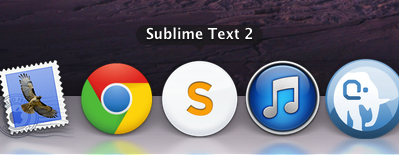
Icon
Sublime's default icon is fairly ugly, but there are a few replacements on Dribbble. One of my favorites is by Elliot Jackson. To install it, download the icns file and replace the application's icon:
$ mv ~/Downloads/st2.icns /Applications/Sublime\ Text\ 2.app/Contents/Resources/Sublime\ Text\ 2.icns
Pasting
One suggestion from Jason Barry is to use 'Paste and Indent' for ⌘V instead of the standard 'Paste'. This adjusts your indentation to automatically match the context it's pasted in. To do this, put the following in your Key Bindings - User file:
[
  { "keys": ["super+v"], "command": "paste_and_indent" },
  { "keys": ["super+shift+v"], "command": "paste" }
]
More packages
A few more packages you may find useful:
- Git - Git blame/branch support
- CoffeeScript - .coffee syntax highlighting
- Eco - .eco syntax highlighting
- Stylus - .styl syntax highlighting
- Sass - .sass syntax highlighting
- SublimeLinter - lint code as you type
- GitGutter - show Git diffs in the gutter
Conclusion
So that's a fair bit of setting up required for an editor, most of which you'd think would be the default configuration. Sublime Text 2 definitely needs a bit of polishing from a product perspective. The default website, icon, and theme are ugly to say the least, and it would be convenient to be able to install the editor through the App Store. A GUI for configuration would be a good idea as storing preferences in JSON files may appeal to programmers, but it definitely alienates designers.
That said it's early days for the editor, and the core framework has clearly been built extremely well. It's ridiculously fast, stable and very extendable. I love it and absolutely recommend you try it.